.png)


The Chassis
- Phil Seddon

- Oct 16, 2014
- 3 min read


Twisting my Chassis
What a great title, sounds like a visit to a 1970s disco! Fortunately for my back it wasn't and it was a test I have been dying to do on the truck.
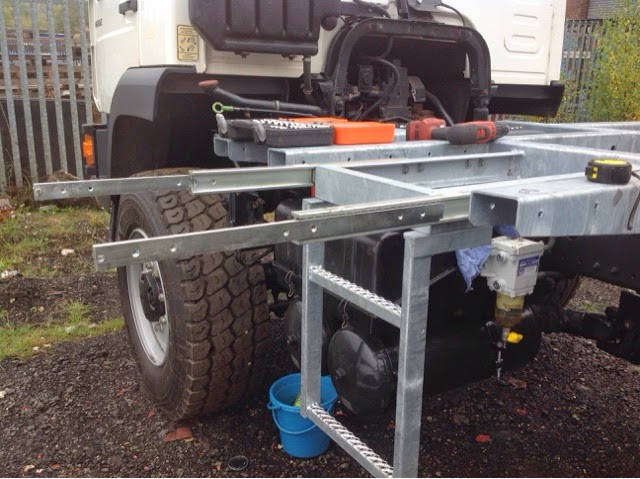
The two chassis rails on the MAN are designed to twist over rough ground as an integral part of the truck suspension. When I build my camper body on the back I don't want all of that torsional stress pulling it apart so I am installing a torsion reducing subframe. (If you want to see a great explanation of this look here Steven explains it and more better than I ever could) The principle of mine is fixed at the back and using springs to allow twist. My worry is to allow enough twist to avoid damage and still give an acceptable ride.
I am waiting for a slot at the galvanisers for my sub chassis and needed to remove all of the fixings so used the 15 ton hoist to twist.
Yes that wheel is 450mm off the ground.
I am not just playing about I measured the deflection with and without the springs.
This was my biggest surprise without springs the two chassis parted 104mm at the front with the rear wheel 450mm (where the other two adjacent wheels were about to lift) from the ground.
With my current spring set in place the front set bottom out at 35mm separation at a lift at the rear wheel of 250mm. This was interesting as the strength in the sub chassis lifted the other two wheels and the whole truck came swinging towards me. NB must ensure the hoist is vertical next time.
Another thing I have to watch for is that the chassis doesn't ground out on my new fuel tank. This is how close it got at max with no springs 2mm,
too close!
More boring detail.....only read if you must
I have 6 sets of springs down each chassis rail
The deflection without springs (1 at the back to 6 at the front) is ;-
Position 1 2 3 4 5 6
Gap 10 25 43 65 86 104
As a result of my testing I am happy with the compression strength (is that the correct term?) of my springs.
I need longer springs to give more movement at the front 4 spring hangers
I would like the front springs to bottom out at about 80 mm this will give a range of movement to allow cabin protection but not hit the fuel tank or battery box.
I have ordered a set of double height springs ...WATCH THIS SPACE
Galvanised Chassis
Well the sub chassis came back from the galvanisers, as always it didn't run smoothly as they spotted a little remaining paint on the brackets and wouldn't dip it. So a quick blast over to Liverpool armed with blowtorch, grinder and Nitromors and they gave it the ok.
My mate Mog on the fork lift
Lots of nuts and bolts to sort
That's the winch under the blue plastic still not happy still with the finish on the brackets so intend to sand them down and paint them.
New springs in "Bright Red". High tensile bolts due in tomorrow
I have made some good progress this week but again have been a little frustrated by small details like re cutting the threads on the wheel holder nuts..( I broke a die that I borrowed from a friend) and still didn't cut the threads. The guys ordered bolts for my new springs that look great but the bolts were too thick 14s instead of 12s and too short 180 instead of 200. Then turns out you can't buy 10.9 12s at 200 so I am having to have them made.
I have re fitted the sliders for my step. The sliders will support a landing stage and the ladders (little Jumbo) will fix to three sides.
We have now cut the threads on my wheel holder but had to do it by hand using a lathe box die....new one on me
If anyone is having a part galvanised and it has a threaded section I would suggest painting the threads so the galv wont take then remove the paint afterwards by using Nitromors.
I should sometime next week be in a position to measure for my body panels but that will need a decision on the windows and door. looks like a sleepless weekend


Comments